








Install guide

Install WheelGlow in an afternoon.

Four rings, one controller and plug-and-play connectors. Everything you need to fit WheelGlow LED wheel rings yourself, from fit check to first light.

  • 2–3 hrsInstall time
  • ModerateDifficulty
  • 12VBattery powered
  • 6 stepsStart to finish
Orange LED wheel ring mounted behind a pickup truck wheel, glowing through the rim spokes
Before you start

Two minutes now saves an hour later.

  • Check the ring size first

    The ring has to be bigger than your brake assembly. 15.5″ rings suit 17–19″ wheels and 17″ rings suit 20–22″ wheels. Measure your caliper and rotor before you start.

  • Lift it safely

    Use a jack and rated jack stands, never just the jack. Chock the wheels that stay on the ground and let the brakes cool before you touch them.

  • Battery off for wiring

    Disconnect the negative battery terminal before you run or connect any power wiring.

  • Know your local rules

    Rules on coloured lights while driving vary by province and state. Read our FAQ and check what is allowed where you drive.

In the box

Everything's included.

Four rings with the LEDs already sealed in, plus everything to connect them.

Everything's included.
  • 4×LED wheel ringsWaterproof LEDs pre-attached, with a 13 ft lead on each ring
  • 1×4-port distributor cableConnects all four rings to the controller
  • 1×2-port underbody distributor cableIncluded distributor for the underbody side of the wiring
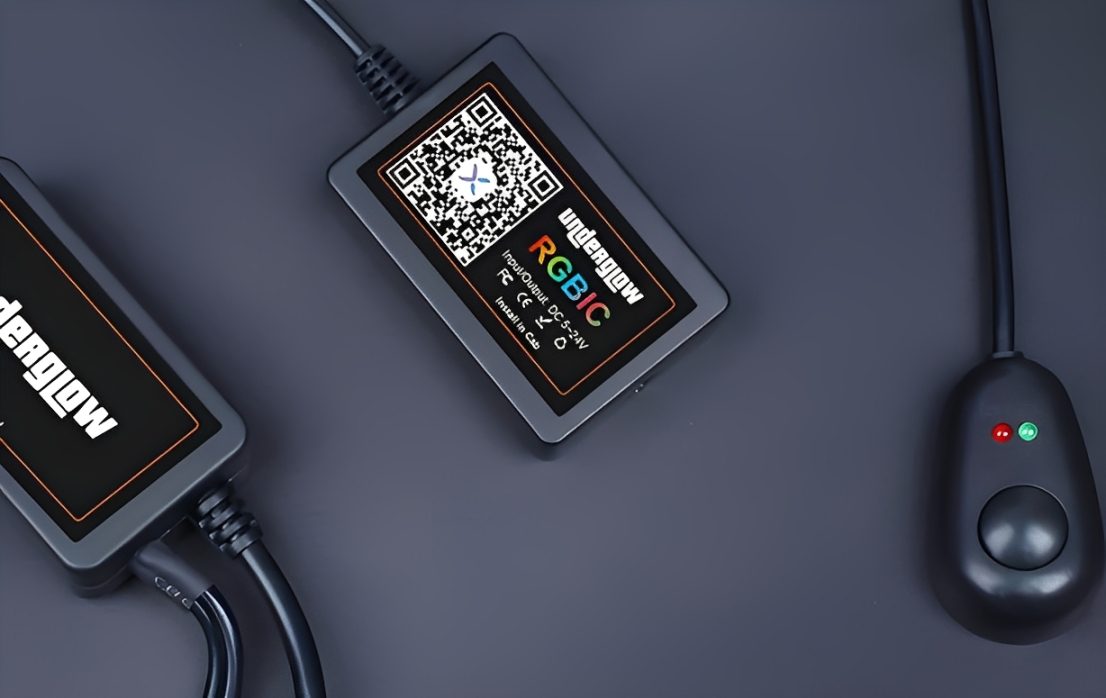
  • 1×Bluetooth controllerRuns the app, the remote and music modes
  • 1×RemotePower, colours and modes without the app
  • +Brackets, screws & clipsEach ring has 10 pre-drilled holes, 5 brackets and 2 clip-on brackets
Tools

What you'll need.

The wheels come off, so you need a safe way to lift the vehicle. Mounting hardware is in the box.

  • Jack and rated jack stands
  • Lug wrench or impact wrench
  • Socket set and screwdrivers
  • Mounting brackets and screwsincluded
  • Zip tiesoptional
  • Drill with small bitsoptional
  • Thread lockeroptional
  • Test light or multimeteroptional
Step by step

Six steps to glowing wheels.

Work one wheel at a time. The photo follows the step you are reading.

Check the fit & test
1Step 1

Check the fit & test

Before anything comes apart, make sure the rings clear your brakes and that every ring lights up.

  • Confirm each ring is larger than your caliper and rotor.
  • Plug all four rings into the distributor and controller on the ground, power it and test them from the app.
  • Plan a path for each wire from the wheel to the engine bay, along the frame and away from the exhaust.
Pro tipLabel each ring and its lead front-left, front-right, rear-left and rear-right so nothing gets mixed up.
Lift & remove the wheel
2Step 2

Lift & remove the wheel

Park on level ground and work on one wheel at a time.

  • Put the vehicle in park and set the parking brake.
  • Loosen the lug nuts, lift with the jack and support the vehicle on jack stands.
  • Remove the wheel so you can see the dust shield and brake assembly.
Pro tipNever put any part of your body under a vehicle that's only on a jack.
Mount the ring
3Step 3

Mount the ring

The ring sits behind the brake, centred around the hub. It attaches to the dust shield or hub assembly with the included brackets.

  • Hold the ring in place and centre it with an even gap all the way round.
  • Adjust the pre-attached brackets to reach the dust shield or a solid mounting point.
  • Fasten with the included screws, and add the clip-on brackets where you want extra hold.
  • Spin the hub by hand and make sure nothing touches the rotor, caliper or any moving part.
Pro tipA drop of thread locker on the bracket screws helps them stay tight.
Route the wires
4Step 4

Route the wires

Run each ring's lead to the distributor cable near the controller.

  • Follow brake lines and suspension parts, leaving slack for steering and suspension travel.
  • Zip-tie every 20–30 cm (8–12 in), away from the exhaust, brakes and steering parts.
  • Use existing rubber grommets wherever a wire passes through metal.
  • Repeat steps 2 to 4 on the other three wheels.
Pro tipTurn the steering lock to lock and check the front leads never pull tight.
Connect & power up
5Step 5

Connect & power up

Mount the controller in a dry, protected spot in the engine bay and connect it to the battery.

  • Plug each ring into the distributor cable using the waterproof 6-pin connectors.
  • Plug the distributor cable into the controller.
  • Red lead with the inline fuse to the battery positive (+).
  • Black lead to the battery negative (−) or a clean chassis ground.
  • Optional: connect brake, reverse and turn signal syncing using the wiring diagram in the user guide.
Pro tipReconnect the battery only after every connection is made.
Test, refit & ride
6Step 6

Test, refit & ride

Bring it to life, then put everything back together.

  • Pair the controller with the app and test every ring and mode.
  • If you wired signal syncing, test the brake, reverse and turn signals.
  • Refit the wheels and torque the lug nuts to your vehicle's spec.
  • Take a slow test drive, listen for rubbing, then recheck every bracket and wire.
Pro tipA user guide with detailed instructions is included in the box.
Wiring

Wiring at a glance.

Every ring plugs into the distributor cable, and the controller takes its power straight from the battery.

  • Red lead (inline fuse)Battery positive (+)
    Keep the fuse in place.
  • Black leadBattery negative (−) or chassis ground
  • Each ring (6-pin plug)4-port distributor cable
    Then the distributor cable plugs into the controller.
  • Brake, reverse & turn syncYour vehicle's signal circuits
    Optional. Follow the wiring diagram in the user guide.
Pro tips

Do it once. Do it right.

  • Clearance firstSpin the hub by hand after mounting each ring. If anything scrapes, re-centre the ring before you move on.
  • Slack at the frontFront wheels steer. Leave a gentle loop of wire so nothing pulls tight at full lock.
  • Recheck after 100 kmThings settle. Re-torque the lug nuts and check the brackets and zip ties after your first few drives.
  • Keep them cleanThe rings are IP68 rated, but rinsing off road salt and grime keeps them bright through winter.
FAQ

Install questions.

Stuck? Send us a photo and your order number and we'll help.

How long does the install take?

Most installs take 2 to 3 hours, since each wheel comes off. Give yourself an afternoon if it is your first time.

Which ring size do I need?

15.5″ rings fit 17–19″ wheels and 17″ rings fit 20–22″ wheels. Either way, the ring has to be bigger than your brake assembly.

Do I need to drill?

Usually not. The rings mount to the dust shield or hub assembly with the included brackets and screws. On some vehicles a small pilot hole makes a bracket easier to fix.

Can I drive in the rain or snow?

Yes. WheelGlow rings are IP68 rated, with the LEDs and circuit board sealed in silicone against water, dirt and dust.

Do the brake and turn signal features need extra wiring?

Yes. WheelGlow has built-in brake, reverse and turn signal functions. Connect them to your signal circuits as shown in the included user guide.

Are instructions included?

Yes. A user guide with detailed instructions and app download steps is included in the box.

More guides

Installing more than one kit?

Ready to glow?

Pick your ring size: 15.5″ for 17–19″ wheels or 17″ for 20–22″ wheels, single or double sided.